New Riprap Installation
Durable new riprap for shorelines that have never been protected or are washing away, sized and built for your lake.
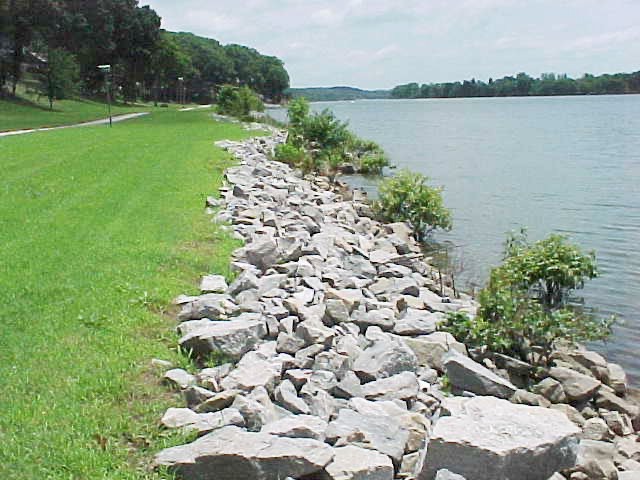
What new riprap installation involves
A new riprap installation is a whole shoreline armor system, not just a pile of rock at the water line. Done right, it is a graded slope, a filter layer, a toe keyed in below the water line, and a blanket of properly sized rock on top, with every part doing its own job.
A new install makes sense for shorelines that have never been protected and are actively washing away, for lots that were just built or re-graded, and for banks where softer, planted methods will not hold up to the wave energy or boat wake the site sees.
Every lake and every stretch of shore is a little different. The rock size, the slope, and the toe depth all come down to your exposure, your water depth, and your soil. We build the install around your conditions instead of running the same spec everywhere.
How we do it
Our step-by-step process for new riprap installation.
- 1
Assessment and design
We look at your exposure, water depth, soil, and bank height, then size the rock and set the slope and toe depth the site actually needs.
- 2
Permitting guidance
New shoreline work below the ordinary high-water level usually needs a DNR public-waters work permit, and sometimes county approval too. We help you understand what is required and how to get it before any rock goes in.
- 3
Grade the slope
We shape the bank to a stable angle. Getting the slope right is what keeps the finished riprap from sliding down the road.
- 4
Lay the filter fabric
We put filter fabric across the graded slope. It lets water pass through while holding the soil in place behind the rock, and it is the most important piece you will never see.
- 5
Place toe rock and build up
We key a solid toe in below the water line, then build the rock blanket up the slope to the right thickness, locking the stone together as we go.
- 6
Finish the top edge
We finish the transition at the top of the rock and restore or seed the disturbed ground so the new shoreline ties cleanly into your lawn or a native buffer.
Why it’s worth doing right
A grant may cover much of this project
Shoreline work like this often qualifies for county cost-share. In Otter Tail County, native shoreline plantings can be funded up to 75% and riprap up to 50%, with comparable programs in Grant and Douglas counties, which can take a real chunk out of what you pay.
See shoreline grants by countyQuestions about new riprap installation
What does new riprap installation involve?
We start by looking at your shoreline and what your property needs. The install includes site prep, proper grading, the filter fabric, a toe keyed in below the water line, and the right-sized rock built up to the right thickness. The goal is protection that lasts and works with your lake's conditions.
Do I need a permit for new riprap?
Usually, yes. New shoreline work at or below the ordinary high-water level typically needs a Minnesota DNR public-waters work permit, and some projects need county sign-off as well. We will guide you on what is usually needed, but you should confirm the requirements with the DNR and your county before work begins.
Should I use riprap or native plantings?
It comes down to how much wave energy and boat wake your shoreline takes. High-energy shorelines often need rock, while gentler banks can often be held with native plants or bioengineering, which also tends to qualify for more grant cost-share. We will give you an honest read for your site. Our shoreline grants page explains why the choice affects what gets funded.
How big does the rock need to be?
Rock size comes down to exposure and water depth. A sheltered bay needs smaller stone than an open, wind-swept shoreline. We size it to your conditions so it stays put through ice-out and storms.
Ready to get started?
Contact us for a free estimate on your new riprap installation project.